1 IMPORTING A MODEL
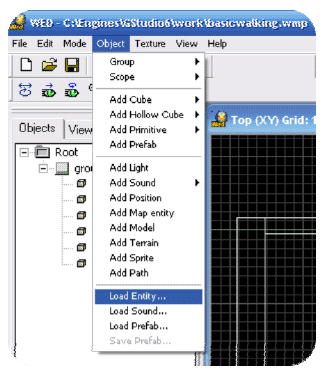
Importing a Model is easy and fun! Models can include your character, non-player characters, level objects, weapons, health supplies, etc. To make a working entity in GameStudio, you must first import a 3D model and then assign functions, or behaviors, to the model. These functions give models unique properties. For example; if you import a model of an elf, you can assign player functions to the model that will allow you to control the elf. Likewise, if you import a health pack, the functions you assign to it will make the model act like a health pack. Things can get really crazy if you assign functions to models incorrectly! How funny would it be if you ran into the elf and it healed you while you controlled the movement of a health pack!- First open the WED (World Editor Program), and click Object -> Load Entity
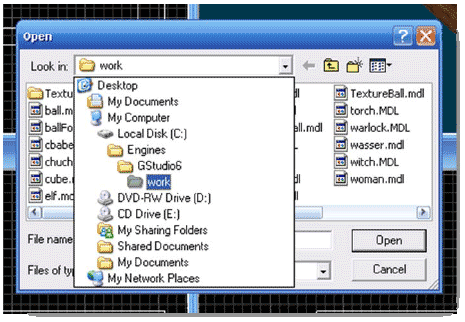
- It is very important that your model is saved into GameStudio's "Work folder"
This folder is usually under "C:\Program Files\GStuido6\work" – this is the default folder in the popup menu
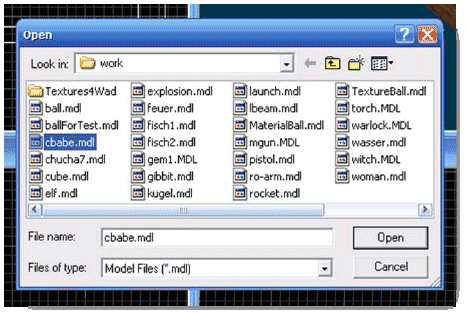
- From here, select your model and Click Open (open "cbabe.mdl" or "warlock.mdl" )
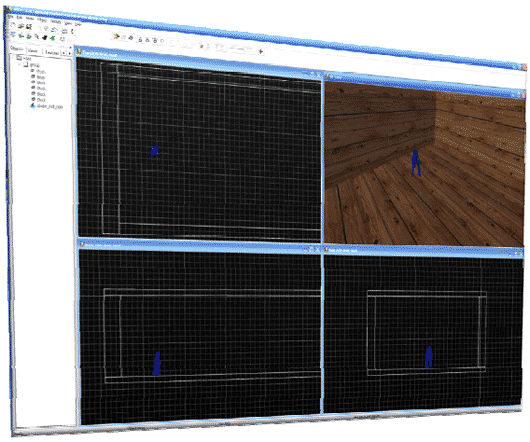
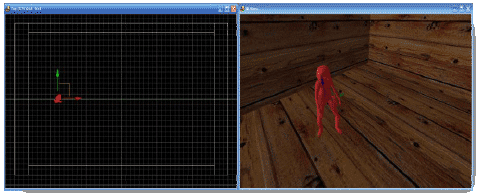
- Notice that "cbabe" may be outside of your room. To get her within the room, simply click the Move button (on the toolbar) and drag her into the room. Be sure to examine all windows to make sure that she's properly aligned
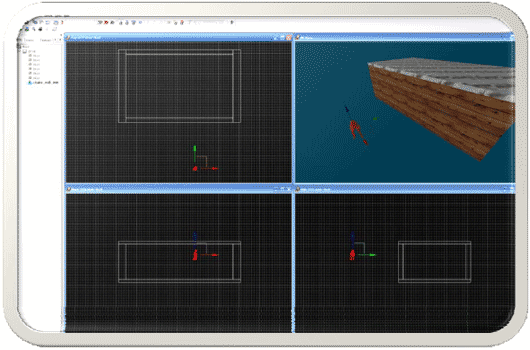
- Your model is now inserted into your level. Wow! That was easy! You can now continue to move this model wherever you want it in your level. You can resize and rotate it!
2 ASSIGNING A FUNTION/BEHAVIOR
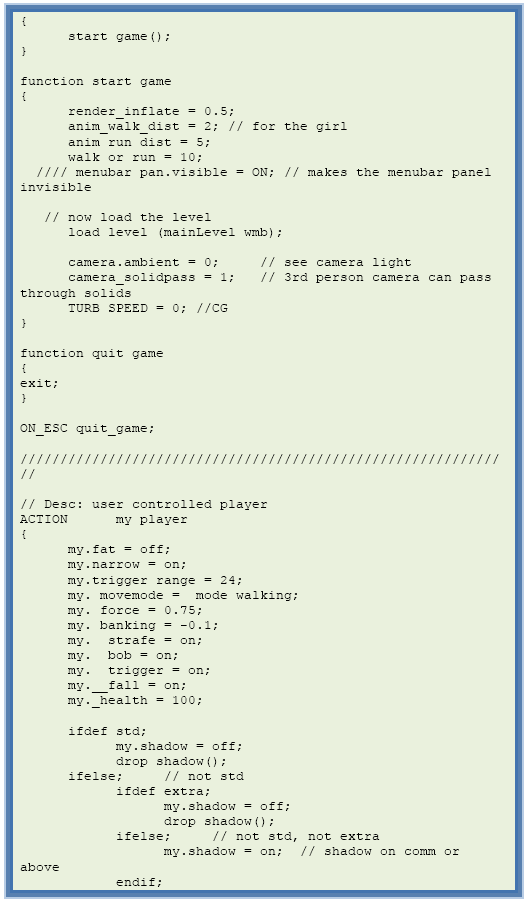
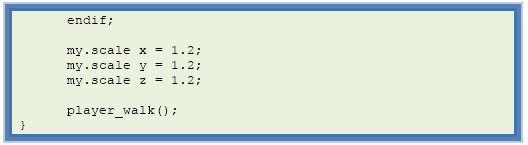
Once you have the model in your level, you probably want it to do something. In order for your model to have some sort of properties, you must assign a function, or Behavior, to the model. To begin with, make sure that you have assigned a script to the game that you are making. The script, which is written in a programming language called C-Script, is what contains all the variables, functions, and other bits of code that will add to making your game awesome!Code1.wdl
Open the SED (Script Editor) and copy & paste this code into it. Save the file as "Code1.wdl" into the work folder (usually under " C:\Program Files\GStuido6\work ")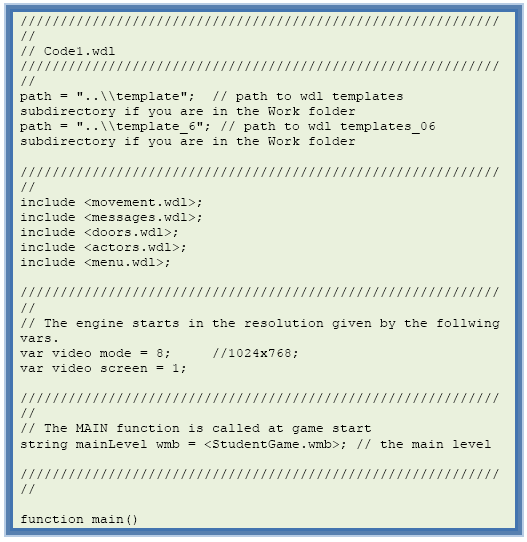
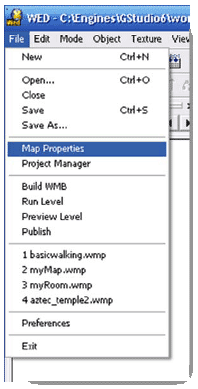
- To add a script to your game, click on File à Map Properties
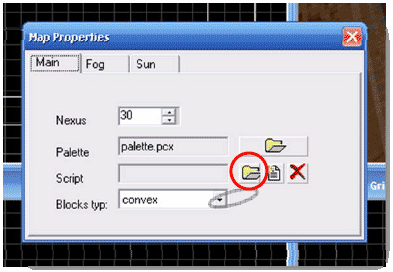
- A pop-up menu entitled Map Properties will appear. As you can see in the Script Box, no script has been defined. To do this, click the Folder icon to the right of the Script Box
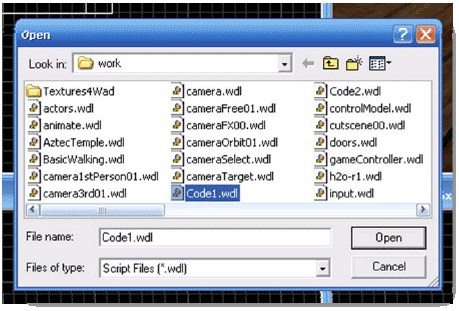
- A pop-up menu will open that defaults to the "Work Folder." From here, select the script file (".wdl") that contains the code for your game. We will use "Code1.wdl"
- Now you will return to the Map Properties dialog box. As you can see, the script file is now inside the Script Box
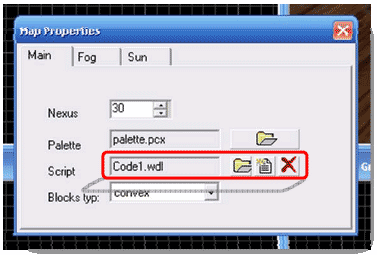
- Then close this menu out simply by clicking the close button. Clicking the red X to the right of the Script Box will remove the script you just added to your game

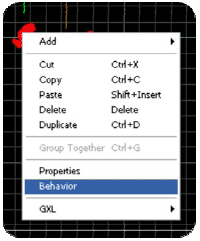
- Now select the model that you want to add a Behavior to. When selected, your model will appear in a red wire frame
- Right-Click the selected model and choose Behavior
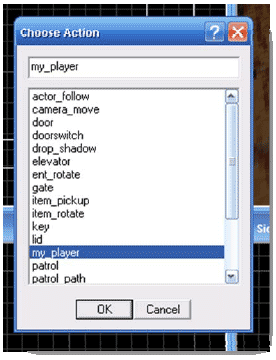
- A pop-up menu will appear. In this menu, you can select the Behavior that you want your model to have. The Behaviors are described in your script. For example, if you want your model to be the character that you play as, choose "my_player" for a health pack, choose "health_pack," etc. You can customize any Behavior and even create your own in the script. But for now, simply select "my_player" and press OK
- Your model now has the Behavior that you chose for it! See how easy and fun that was? You now should have learned all the basic elements of creating a game. If you want to Build and Run your game, you can do so now!
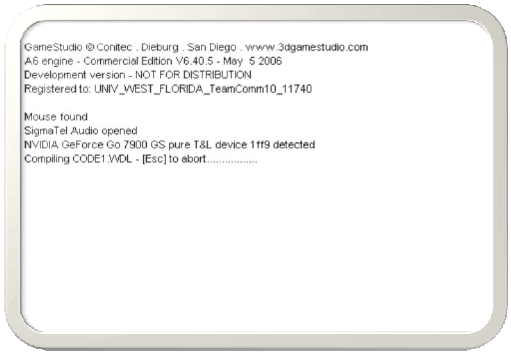
3 COMPLILING AND RUNNING
In order to test a game out, it needs to be Compiled. Compiling takes all the code, models, and levels that have been put together and converts it into a language that the computer can readily understand: machine language !Please take note that this doesn't create your executable file. This simply allows you to "run" your game
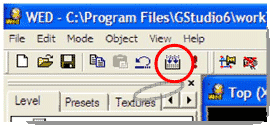
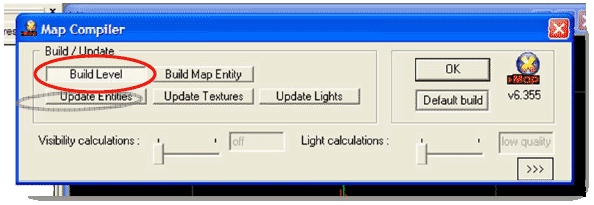
- First, Click the Build button
- A pop-up menu will appear that lets you adjust what exactly you want to compile or update. If you're just doing a quick test, make sure that your Visibility Calculations and Light Calculations are set to Off and Low Quality. This will dramatically reduce the time it takes to compile your game. You shouldn't be able to see a difference between these settings, and (for productivity purposes) you should wait to turn these on until you have finished tweaking your game
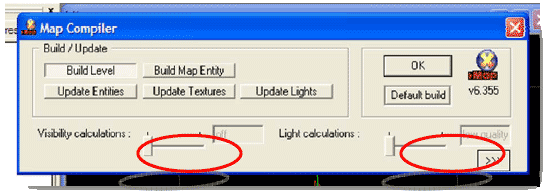
- Make sure that the Build Level button is selected and click OK
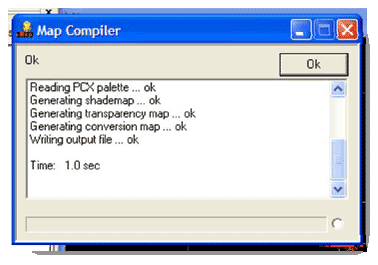
- A Map Compiler dialog box will appear and, depending on the complexity of your game, the time it takes to compile your game will vary.
- Click the Run button

- Click the Ok Button once more in the "Run Level" dialog box
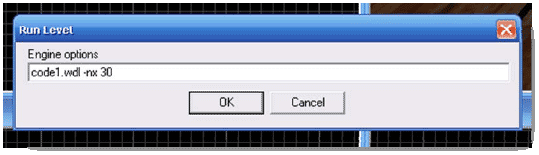
- Your game will now start! Now how have some fun!
source www.jot.fm/issues/issue_2008_01/column5
I enjoyed following the whole entry, I always thought one of the main things to count when you write a blog is learning how to complement the ideas with images, that's exploiting at the maximum the possibilities of a ciber-space! Good work on this entry!
ReplyDelete